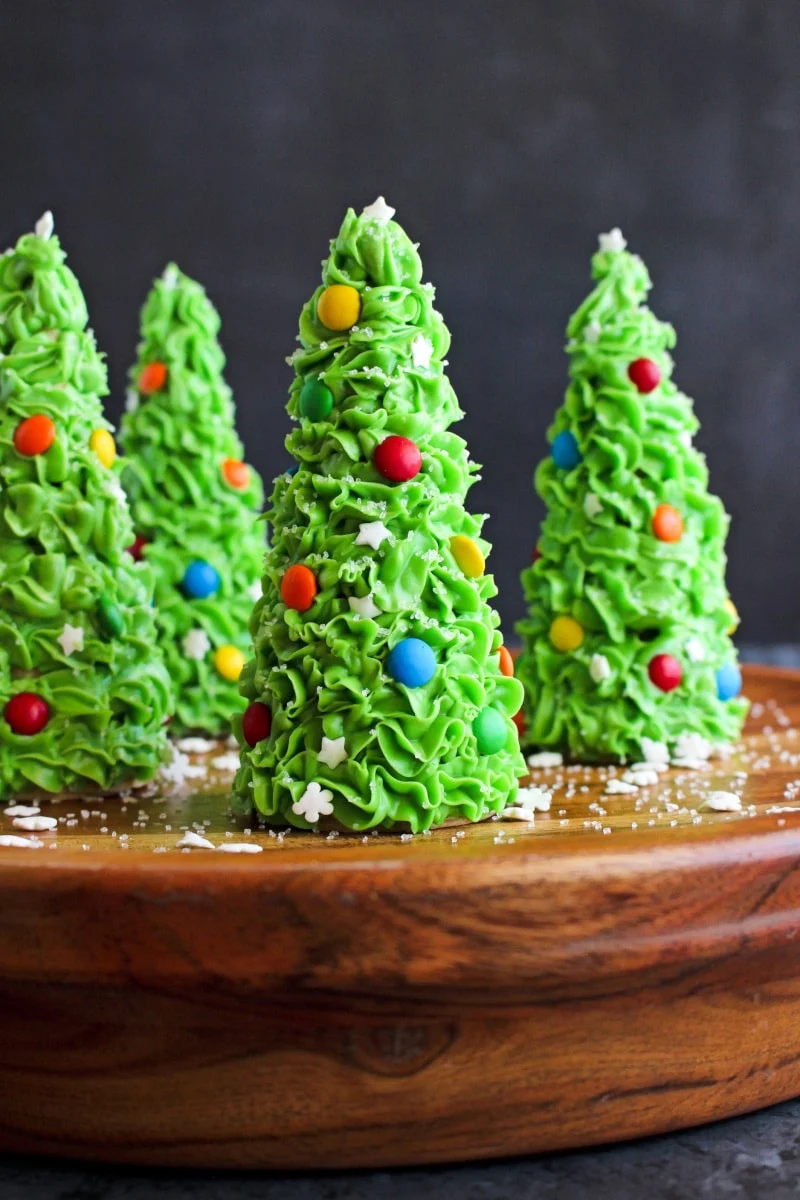
Ice Cream Cone Christmas Trees are a fun and festive holiday treat made with sugar ice cream cones and frosting. Make them with your family for Christmas this year!

This post contains affiliate links. As an Amazon Associate, I earn from qualifying purchases.
Please see our full Disclosure and Privacy Policy.
Please see our full Disclosure and Privacy Policy.

A Note From My Kitchen
If you're looking for a fun (and pretty!) edible craft this Christmas, you should make these little ice cream cone Christmas trees!
These cute Christmas tree ice cream cones are super easy to make, totally fun to decorate with kids, and you can eat them when you're done. What's not to love?!
Pair them with these snow globe cupcakes, reindeer chow, and Grinch Punch or Christmas Hot Chocolate for a festive dessert table this holiday season!
I hope you love making this edible Christmas craft as much as we do!
Happy cooking,


These Ice Cream Cone Christmas Trees are popular because they are an easy edible craftand they are so much fun to decorate. This post includes ingredient notes, answers to frequently asked questions, serving and storage suggestions, a detailed recipe card, and nutritional information.
Ingredients
- Sugar Ice Cream Cones: You want to look for the hard shell cone-shaped ice cream cones with a pointy end, not the sugar cones with a flat bottom. The sugar cone with the shape that comes to a point at the end makes a perfect tree shape when inverted!
- Green Frosting: For easy application, try using Betty Crocker canned frosting that comes with piping tips. You can also use homemade icing or storebought icing and use a butter knife to spread on the icing onto the cone.
- Candies For Decorating: My very favorite decorations for these festive little trees is mini M&M's. They make the perfect little candy Christmas lights for your trees. You can get creative with whatever candies you like though!

Frequently Asked Questions
How Do You Make Ice Cream Cone Christmas Trees?
Ice Cream Cone Christmas Trees are made by piping green frosting onto inverted sugar cones. The frosted cones are then decorated with various candies and sprinkles of your choice.What If I Don't Have Piping Tips For The Frosting?
If you don't have a piping bag or tips, that's okay! If you have a tip, but no bag, you can snip the end off of a plastic baggie and insert the tip into the cut end. If you don't have any piping tips, you can simply use a knife to spread the frosting evenly all over the outside of the cone. You can also purchase a can of Betty Crocker cupcake icing that comes with tips and use that!What Piping Tip Should I Use?
There is no specific tip that is required for this project. Each tip will create a different look for your tree, so get creative and test a few to see what you like best!Am I Supposed to Eat Ice Cream Cone Christmas Trees?
Once you are done decorating your "tree," you can either not eat them and leave the decorated trees on a platter for a fun Christmas decoration or you can eat them if you want to! It's totally up to you. If you decide to eat them, try placing one atop a bowl of ice cream or a cupcake for a fun Christmas dessert!
"The kids loved decorating their own trees. I think they loved eating them even more!"
-recipe author
Serving Suggestions
How to Serve Sugar Cone Christmas Trees
When you make these little trees, you can prepare them on individual plates or group them together on a larger platter to make a cute Christmas scene. They would even make a great addition to your gingerbread house or nativity scene! You can use a little extra icing under the base of the trees to anchor them to the platter.
Let me know if you decide to try this fun and easy edible craft. I'd love to know what you think in the comments below. Enjoy!

Ice Cream Cone Christmas Trees
Yield: 5 TREES
Prep Time: 10 MINUTES
Cook time: 0 MINUTES
Total time: 10 MINUTES
Prep Time: 10 MINUTES
Cook time: 0 MINUTES
Total time: 10 MINUTES
Ice Cream Cone Christmas Trees are a fun and festive holiday treat made with sugar ice cream cones and frosting. Make them with your family for Christmas this year!
INGREDIENTS
sugar ice cream cones
green frosting
mini M&M's
assorted sprinkles
sugar ice cream cones
green frosting
mini M&M's
assorted sprinkles
INSTRUCTIONS
- Hold the cone in your hand and pipe the icing onto the cone starting with the large end of the cone. When close to covering the whole cone, invert it onto a serving platter and finish icing the tip.
- Decorate the frosted cone with mini M&M's and sprinkles.
NOTES
I used Betty Crocker cupcake icing in a can, but if you have time, try making your own white frosting or vanilla buttercream icing with green food coloring mixed in.
Author: Becky Tarala
I used Betty Crocker cupcake icing in a can, but if you have time, try making your own white frosting or vanilla buttercream icing with green food coloring mixed in.
Author: Becky Tarala
More Christmas Recipes
Looking for more holiday treats to make this Christmas season? Check out these popular holiday recipes from the archives:You should also check out this gorgeous Red Velvet Christmas Cake. So perfectly festive!


Which brand of icing did u use, was it whipped?
ReplyDeleteBetty Crocker Cupcake Icing in a can.
DeleteThe comes got soggy😔 and tipped over
ReplyDeleteOh no! I've never had that happen before. I can try to help troubleshoot! What style cone and icing did you use?
Delete